“Snapping the Earth” is a technically incorrect title because “snapping” involves a “snap sound” which usually happens from the camera’s shutter. However, there is no sound in space and so, that sound could never happen! The gathering of information about the physical, chemical, and biological systems of the planet via remote-sensing technologies is commonly known as Earth Observation.
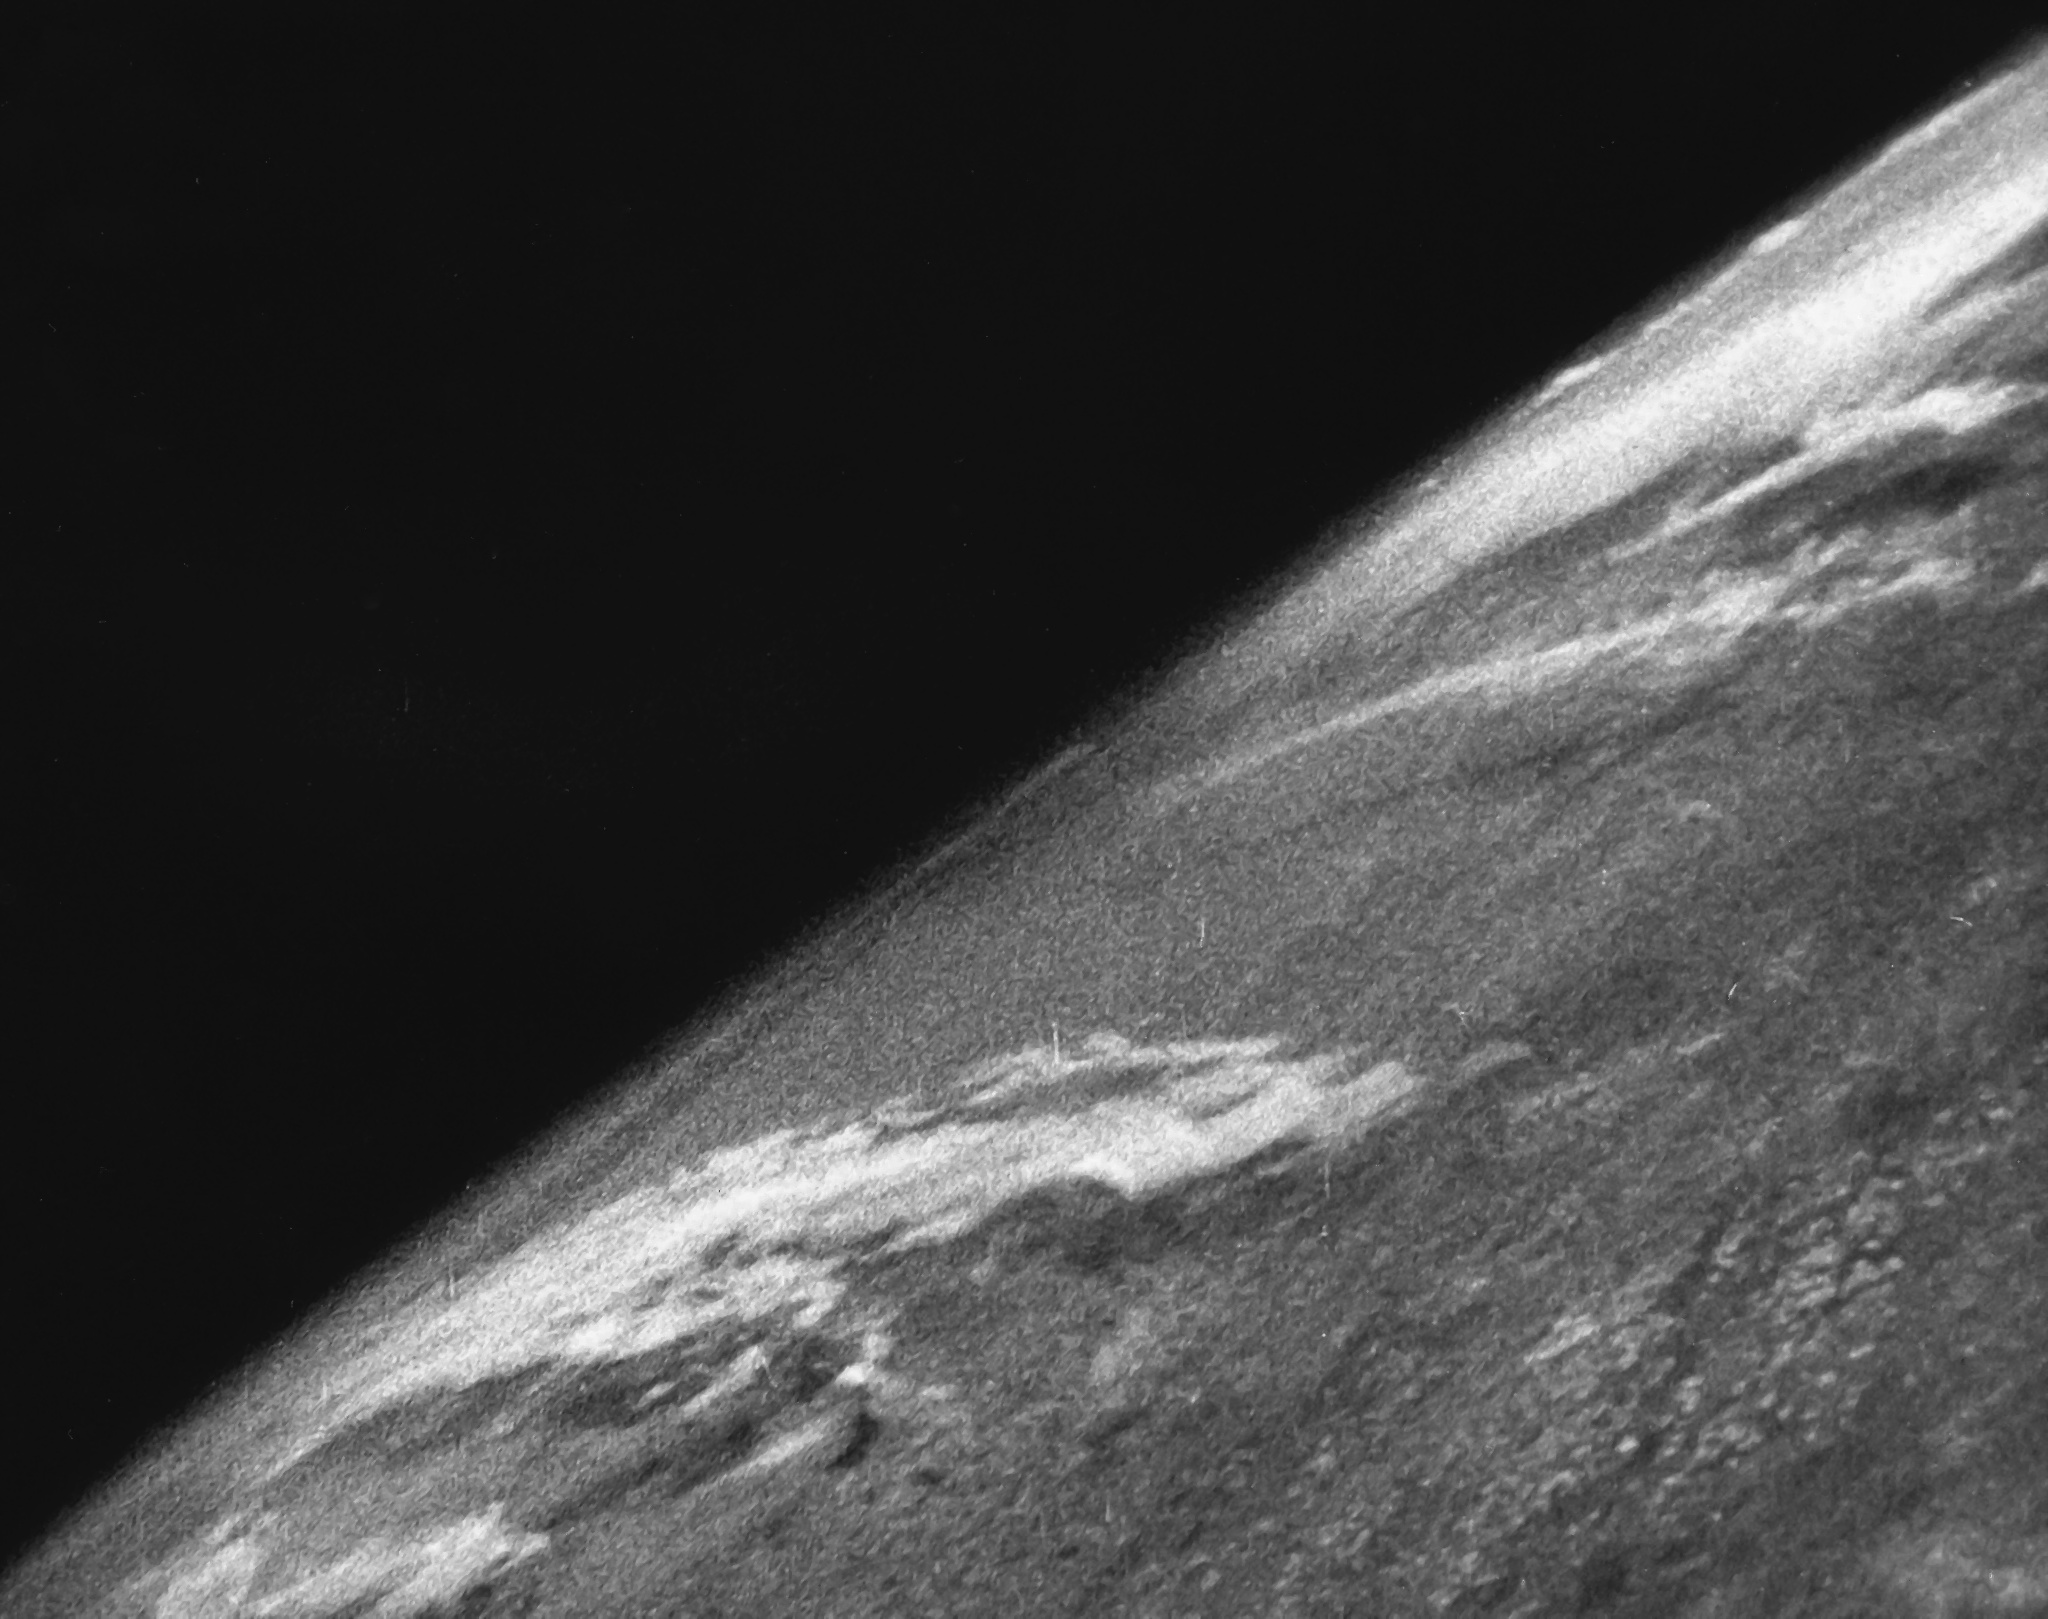
The first image of Earth captured from space was collected soon after the end of the Second World War:
That picture was captured with a camera installed on a V-2 rocket that was launched by scientists in New Mexico and it marked the beginning of Earth Observation done from space. Earth Observation is not only done from space and also includes other activities such as taking measurements of the sea with thermometers, measuring the wind speed, or tracking the seismological activity of the Earth (earthquakes). However, we will focus on the Earth observation that is performed with Earth Observation satellites.
Since that first image, Earth Observation has immensely evolved. For example, check out what the GRACE mission was capable of achieving during its 15 years in space:
While orbiting the Earth, the Earth observation satellites collect data from space for meteorology, mapping, measuring the environment, and others. The data can be used to detect changes in the biodiversity like deforestation or climate change, forecast the weather, cartography, and provide fast aid response to natural disasters like fires, floods, earthquakes, or tsunamis.
Earth observation satellites are usually about the size of a car/bus and carry instruments that are meant to be operated in Low Earth Orbit (LEO). They usually orbit in a range of altitude of about 600-1000 km and they have very good attitude control with a very precise pointing accuracy.
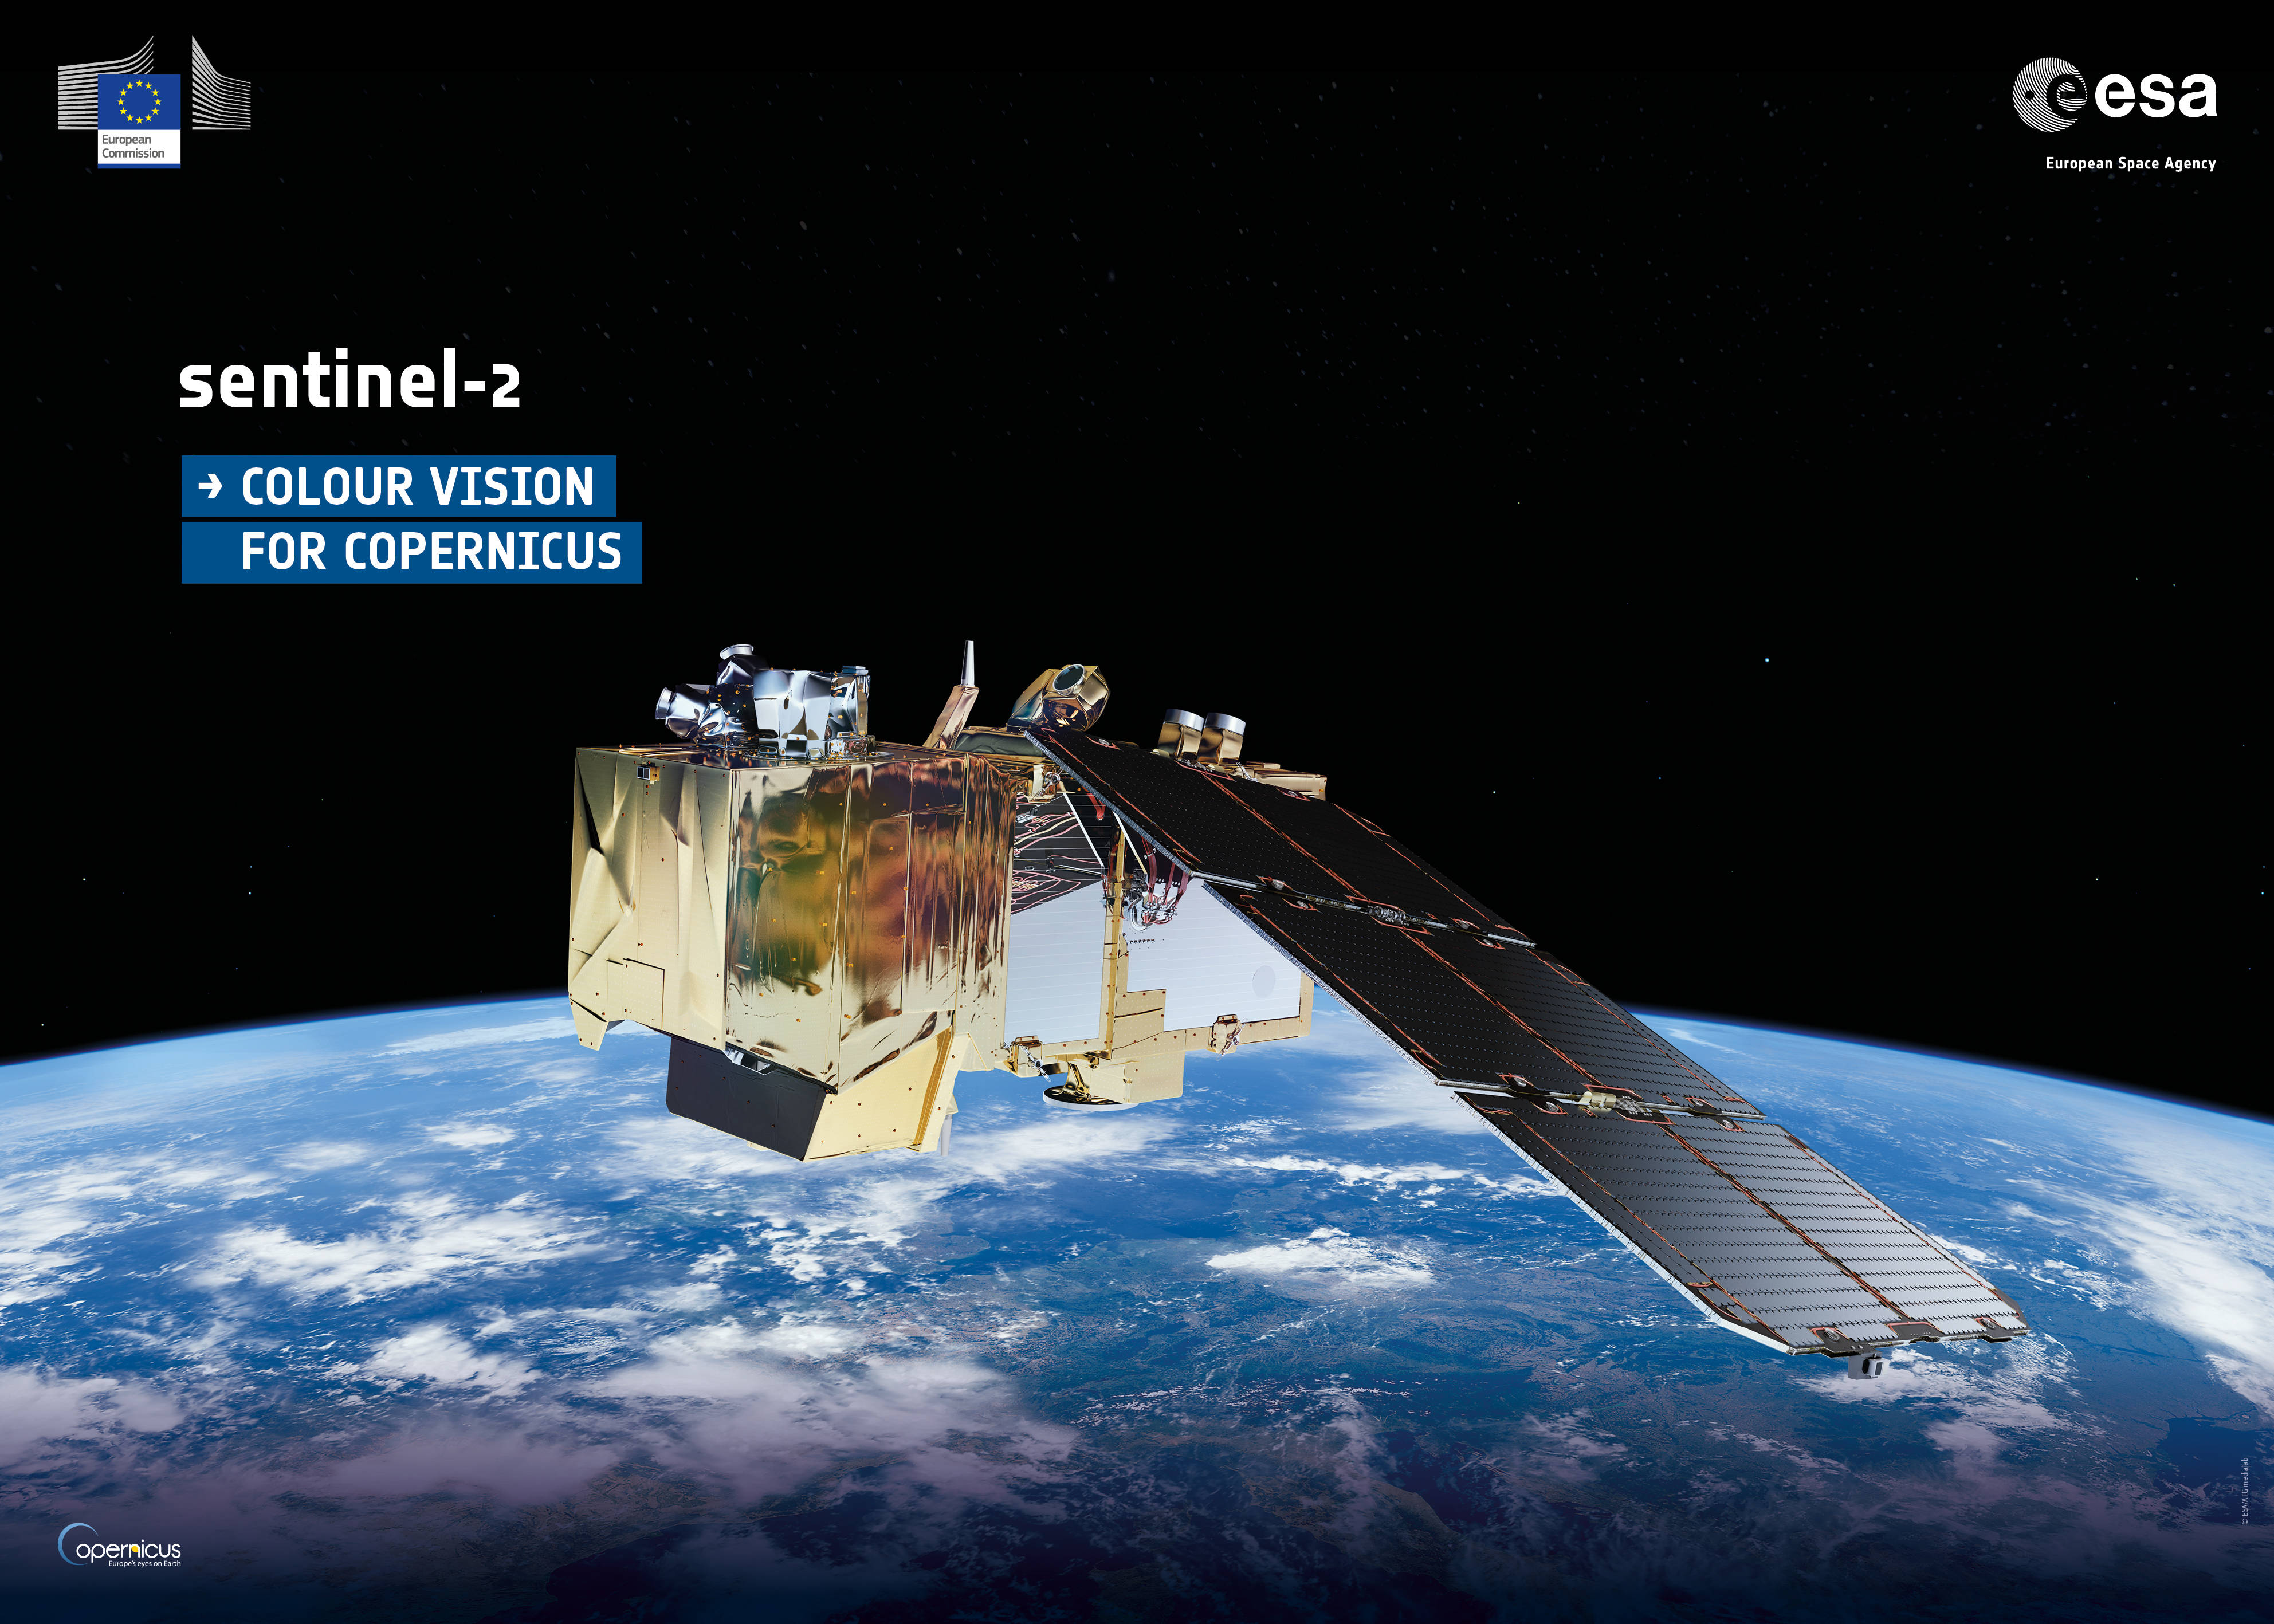
Earth observation satellites are not just used for taking optical images and usually they also have many other sensors and instruments on-board. For example, they can collect data using radars, radiometers, high precision altimeters, spectroscopes, and/or lasers. The instruments don’t necessarily need to be all in the same satellite, for example, the sentinel satellites from the European Space Agency have different Earth Observation instruments among them.
Satellite imagery used to be limited to governments and private institutions that could afford them but after the turn of the century, Google Earth started to provide satellite images of many places in the world. Since then, the images have been continuously improved and today, anyone is able to find a high-resolution image of his/her house from space.
The Copernicus Programme from the European Commission is being developed in partnership with the European Space Agency to create a united Earth Observation programme for the European Union. It will provide full, free and open access to the data of the sentinel satellites when it reaches the operational phase. The objective of the programme is to create an ecosystem of companies that are focused on providing added value services to users from the collected data. For example, a company will be able to provide to its users the information of when it is the best time to harvest their crop.
The commercialization of Earth observation data is shifting from the pure raw data (the images) into the actual information relevant to the user. Many terabytes of raw data are collected from space daily but only a small fraction is actually used. Extracting the relevant data and delivering the information as a service to the end users is a new growing trend.
Planet Labs is an Earth Observation company that gathers imagery of the entire planet every day and this allows their users to monitor changes that happen on a daily basis. This is done using a constellation of satellites with hundreds of small satellites which are about 30x10x10 centimeters and can deliver images with a ground resolution of a few meters.
The use of small satellites has become popular in the last decade and they are slowly changing the way we do Earth Observation as massive constellations of satellites are being launched instead of just a small set of big satellites. These small satellites are mass-produced and if one of them stops operating or dies out, it does not significantly affect the overall process of collecting the data. The small satellites usually weight much less than conventional satellites and so they can be launched at a much cheaper price tag.
Earth Observation images can also be captured in other electromagnetic spectrums such as infrared or ultraviolet. For example, by capturing images in the infrared spectrum, the United States of America was able to find a missile testing facility in North Korea. This facility was generating a lot of heat that could be observed from space. This is just one example of what Earth Observation satellites can do!
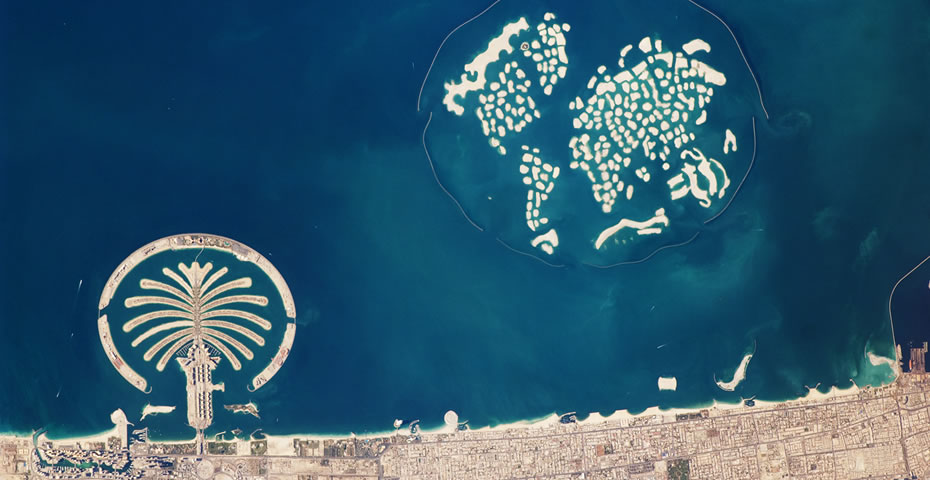
Earth Observation satellites allow us to capture geographic changes in the world. For example, a large-scale project in Dubai was started a few years ago to make artificial islands in the form of a palm trees. These man-made islands are known as “Palm Islands” and were built as a touristic attraction and they host a large number of residential, leisure and entertainment centers. Recently, they have started the construction of "The World Islands", another large-scale project with many small islands that form of a world map when seen from above.
The development of artificial islands is not only done for touristic purposes. China is creating artificial islands in the South China Sea in order to claim the area around them in the future. This will allow China to expand their territory and gain further access to natural resources like oil, natural gas, and fishing areas. From space, it is possible to see that their military presence in the area also keeps increasing.
Satellite Simulator
Ground Camera Instrument
The cameras used in space are not like the ones used here on Earth. Their development usually takes years and there is a long process to make them space-ready, for example, the camera needs to be tested in a radiation chamber to check if the electronics can survive in the harsh space environment.
The company Urthecast used their newly developed “Iris” camera on the International Space Station. This camera has a 1-meter ground resolution and is even capable of recording HD videos.
Our satellite simulator also has a camera that can collect ground images from space. In this activity, we will capture an image of Paris in France and another one of the Midway island in the middle of the Pacific Ocean.
Are you ready to take images from space?
1. Open the AstroMissions App and go to the “Satellite Simulator” tab. Press “Launch!”:
After pressing the button, the satellite simulator will start and a set of instruments will be displayed on the right side.
2. Press the “Ground Camera” instrument icon in order to start it:
The “Ground Camera” instrument will initialize. The “Console View” will be presented during initialization and it will switch automatically to the “Services View” after initialization. We are going to use 2 targets for this instrument:
Target 1: Paris
Target 2: Midway island
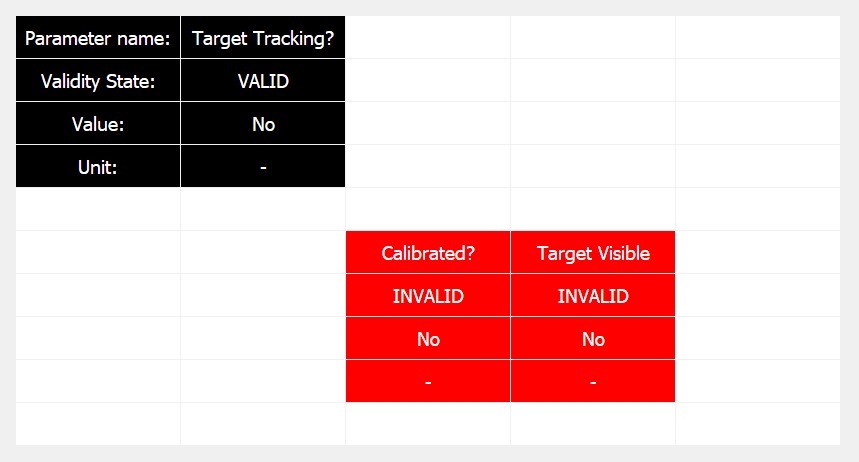
3. Take a look at the Parameters Dashboard:
We can see that the satellite simulator is not in Target Tracking mode. To take a photograph of a certain place, we need to point the satellite to the target.
4. Our first target is Paris! Go back to the "Satellite Simulator" tab and insert in the ADCS panel the following coordinates:
Latitude: 48.8582968
Longitude: 2.2940763
Notice: Don’t forget to press the “Target Tracking Mode” button after inserting the coordinates!
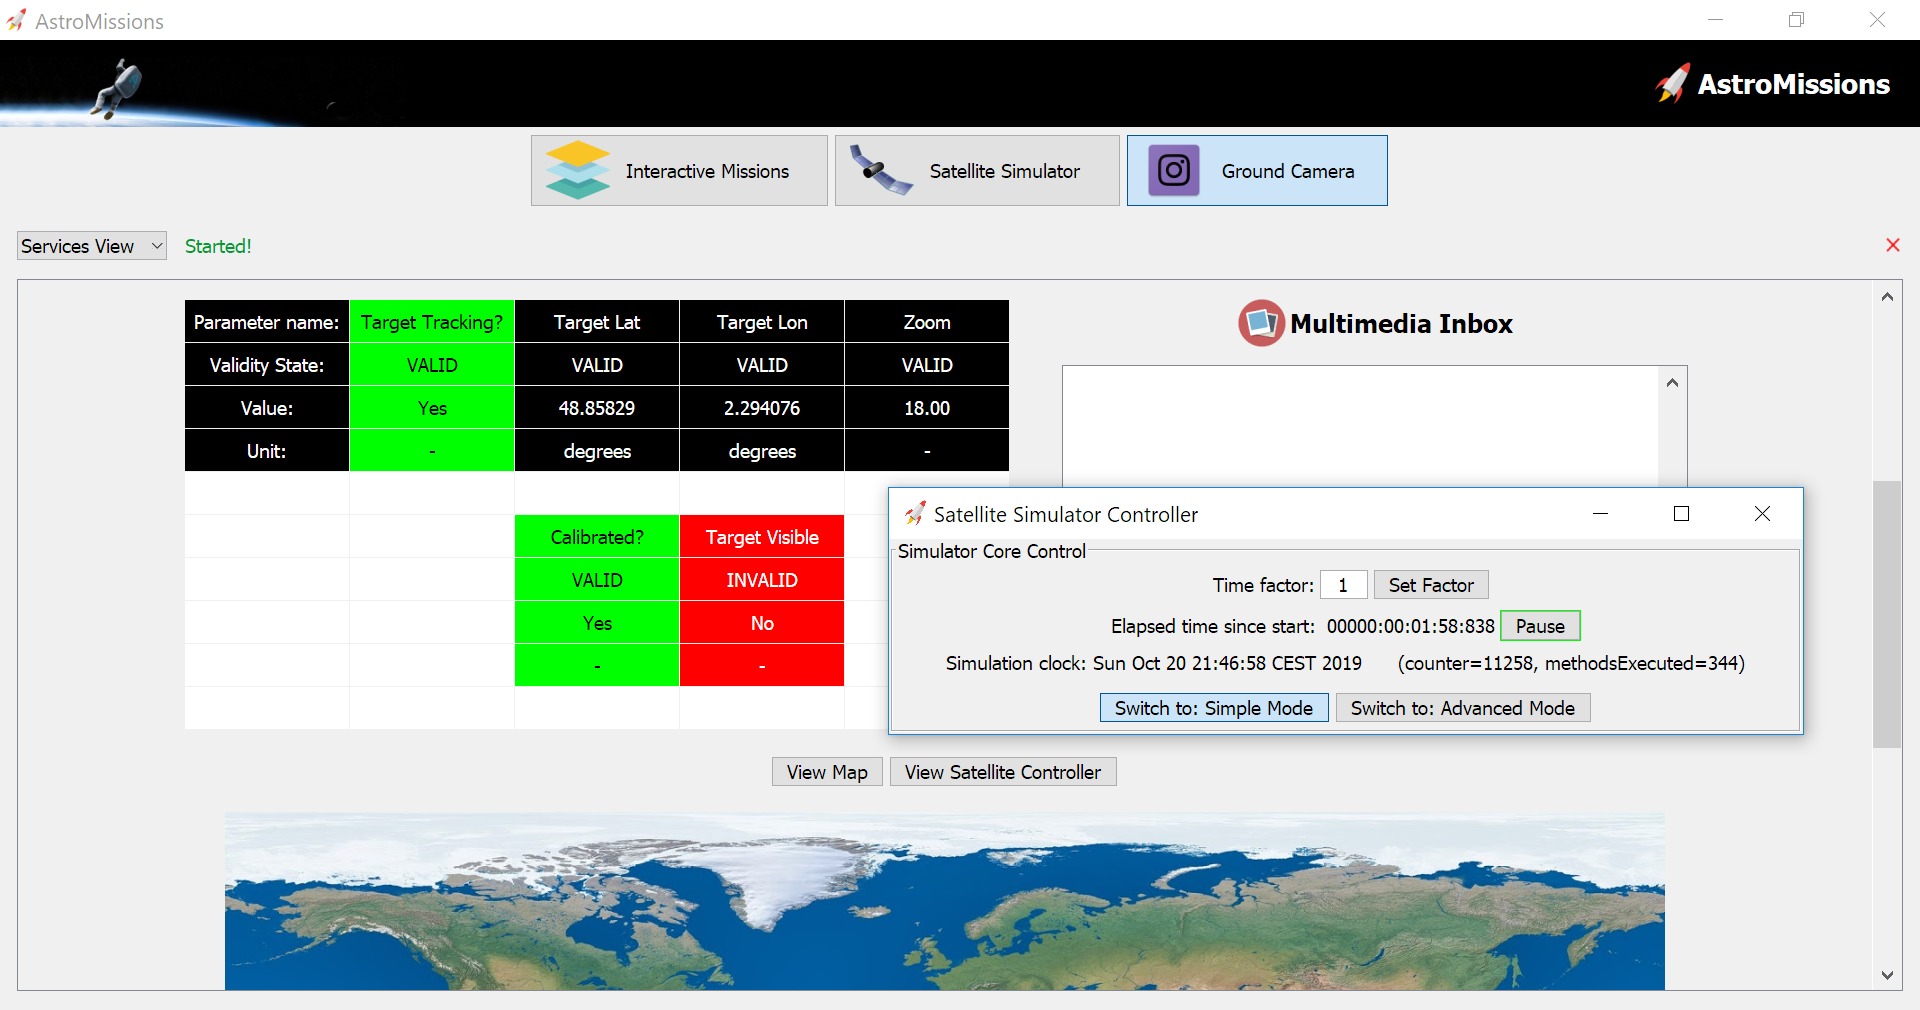
5. Go back to the “Ground Camera” instrument and you should be able to see the selected coordinates in the parameters’ dashboard:
After setting the target coordinates in the “Satellite Simulator” tab, you should be able to see the Latitude and Longitude of the respective target on the upper row. The target coordinates will not blink if the satellite simulator is not in Target Tracking mode.
The “Calibrated?” parameter is red, you must execute the action “Calibrate Camera” in order to be able to take photographs on the next steps.
Notice that "Target Visible" is set as “No” and is blinking red because the satellite simulator is not flying above the selected target. In the next steps, we will speed up the simulation in order to position the satellite above the target that we want and then capture an image.
6. Scroll down to the end of the panel and on the bottom, you will find two buttons. Click on the “View Map” button and then on the “View Satellite Controller”:
The World Map will appear below the two buttons and the Satellite Simulator Controller will appear as a separate window. Change the “Time Factor” to 20 in the Satellite Simulator Controller and wait a few seconds. As soon as the spacecraft reaches the Mediterranean Sea (below Europe), change the “Time Factor” to 1. Be fast on the next steps as the target will only be available for a few seconds!
Did you miss it? If the satellite passes over Paris without taking the photograph, then you will have to stop the satellite simulator and launch the satellite simulator again! (Step 1)
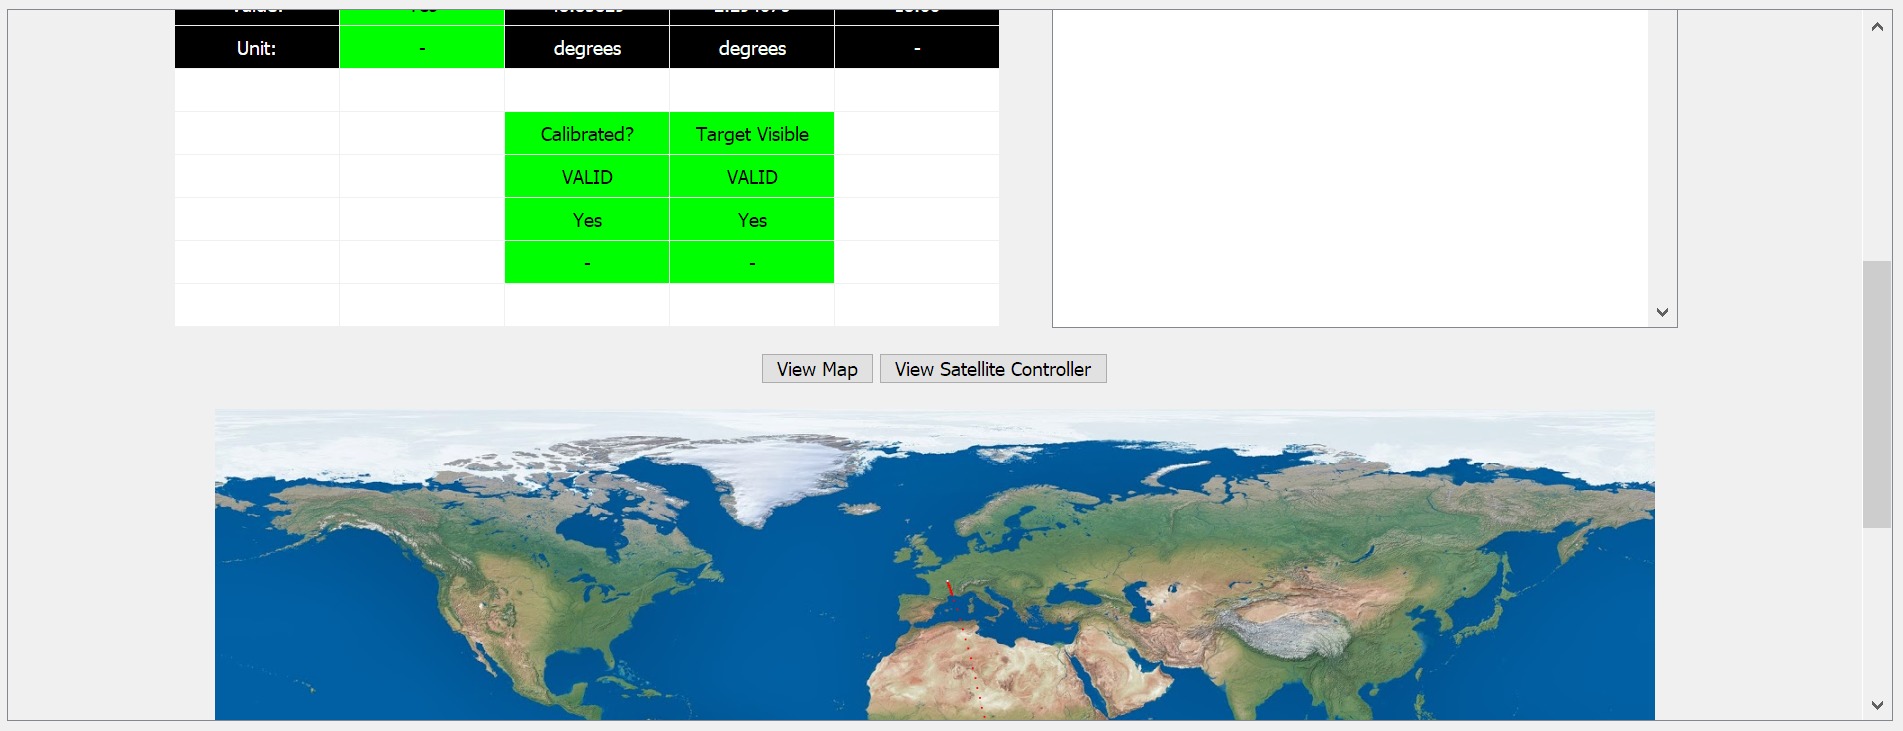
Wait until the "Target Visible" parameter is green before moving to the next step. The parameter will start flashing green when it close enough to the target, just like in the image above.
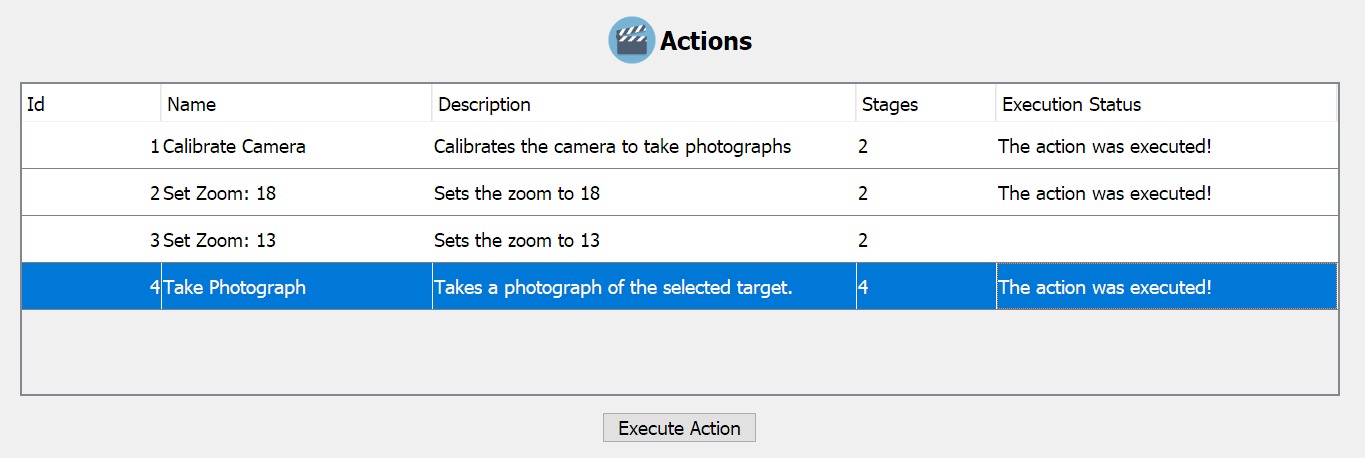
7. Execute sequentially the following actions “Calibrate Camera”, “Set Zoom: 18” and “Take Photograph”:
If the "Take Photograph" action fails, it is because you are probably not flying close enough to the target. In that case, check the previous step.
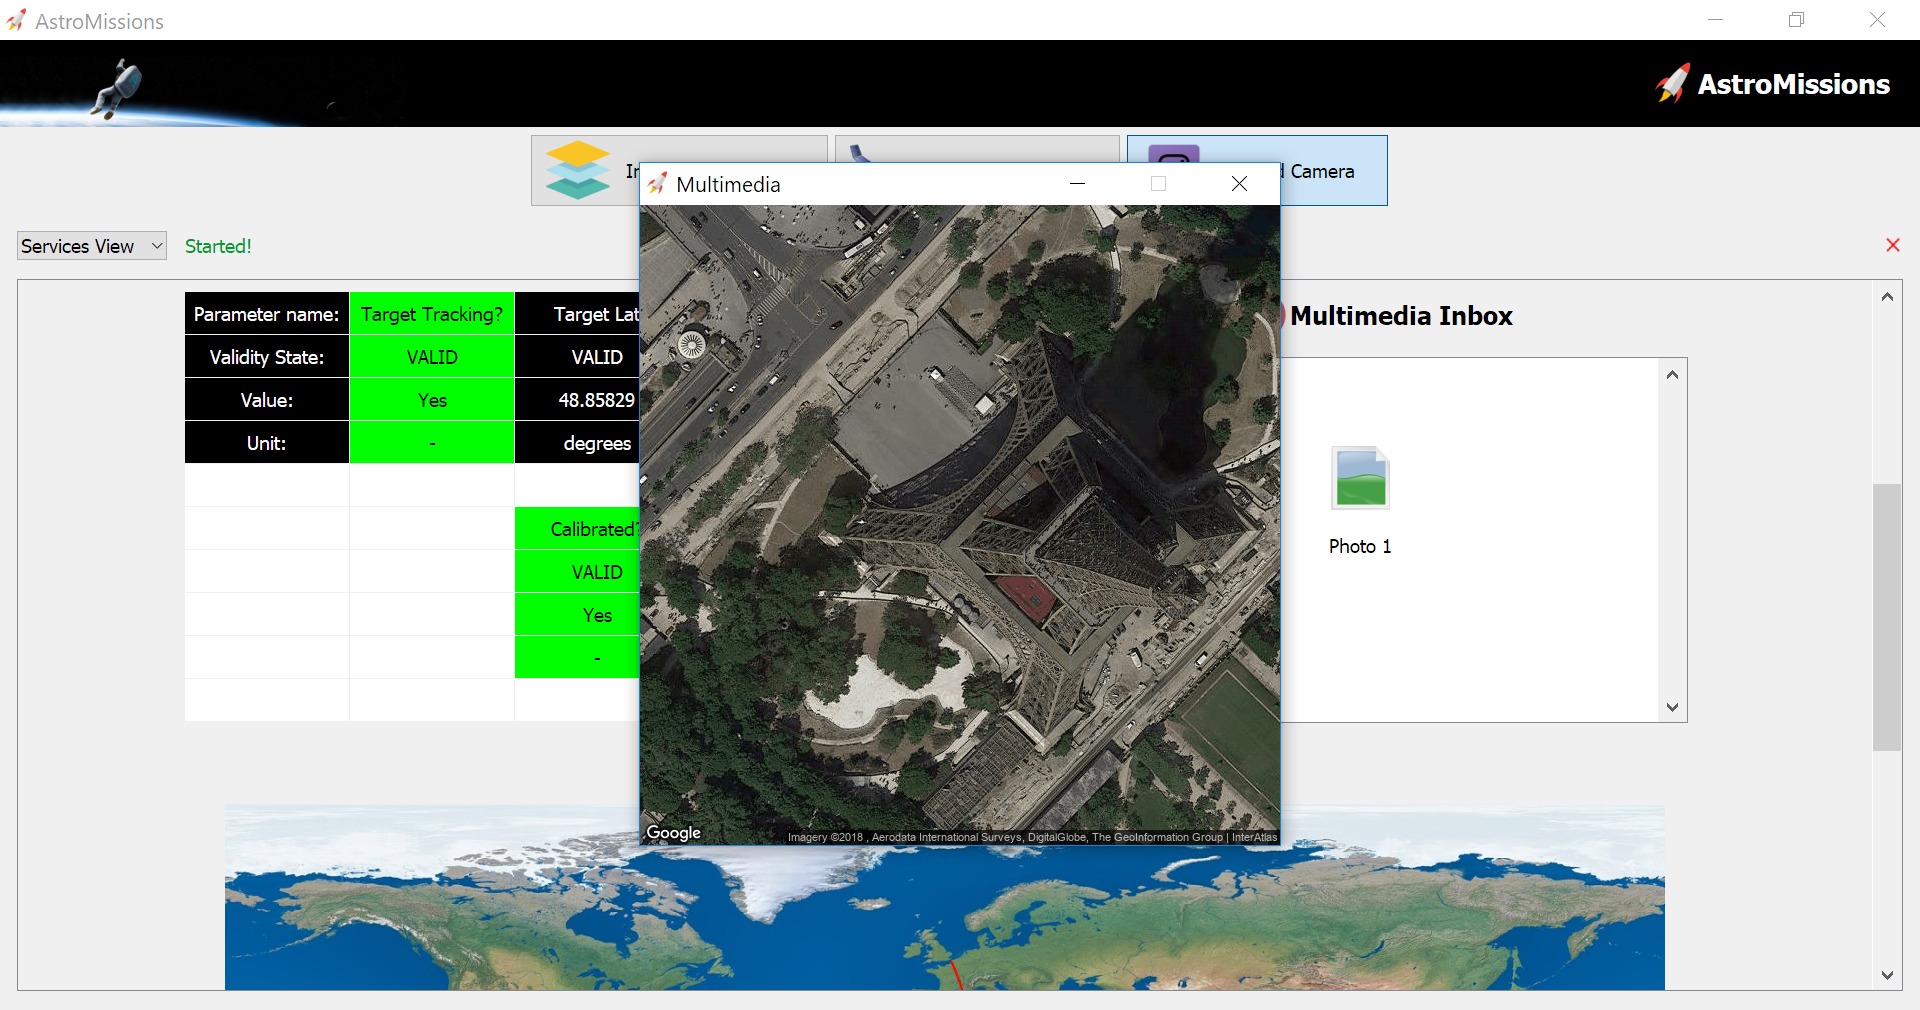
8. You will receive the image in the “Multimedia Inbox”, click on it to see photograph:
A window will appear with the photograph of Paris that you have taken.
9. Now try the same steps but on the other side of the planet, when the satellite is over the second target, the Midway Island (it is near Hawaii). Go back to the “Satellite Simulator” tab and temporarily change the attitude mode to Nadir in the ADCS panel. Change it back to Target Tracking with the following coordinates:
Latitude: 28.2359912
Longitude: -177.3594786
Notice: Don’t forget to press the “Target Tracking Mode” button!
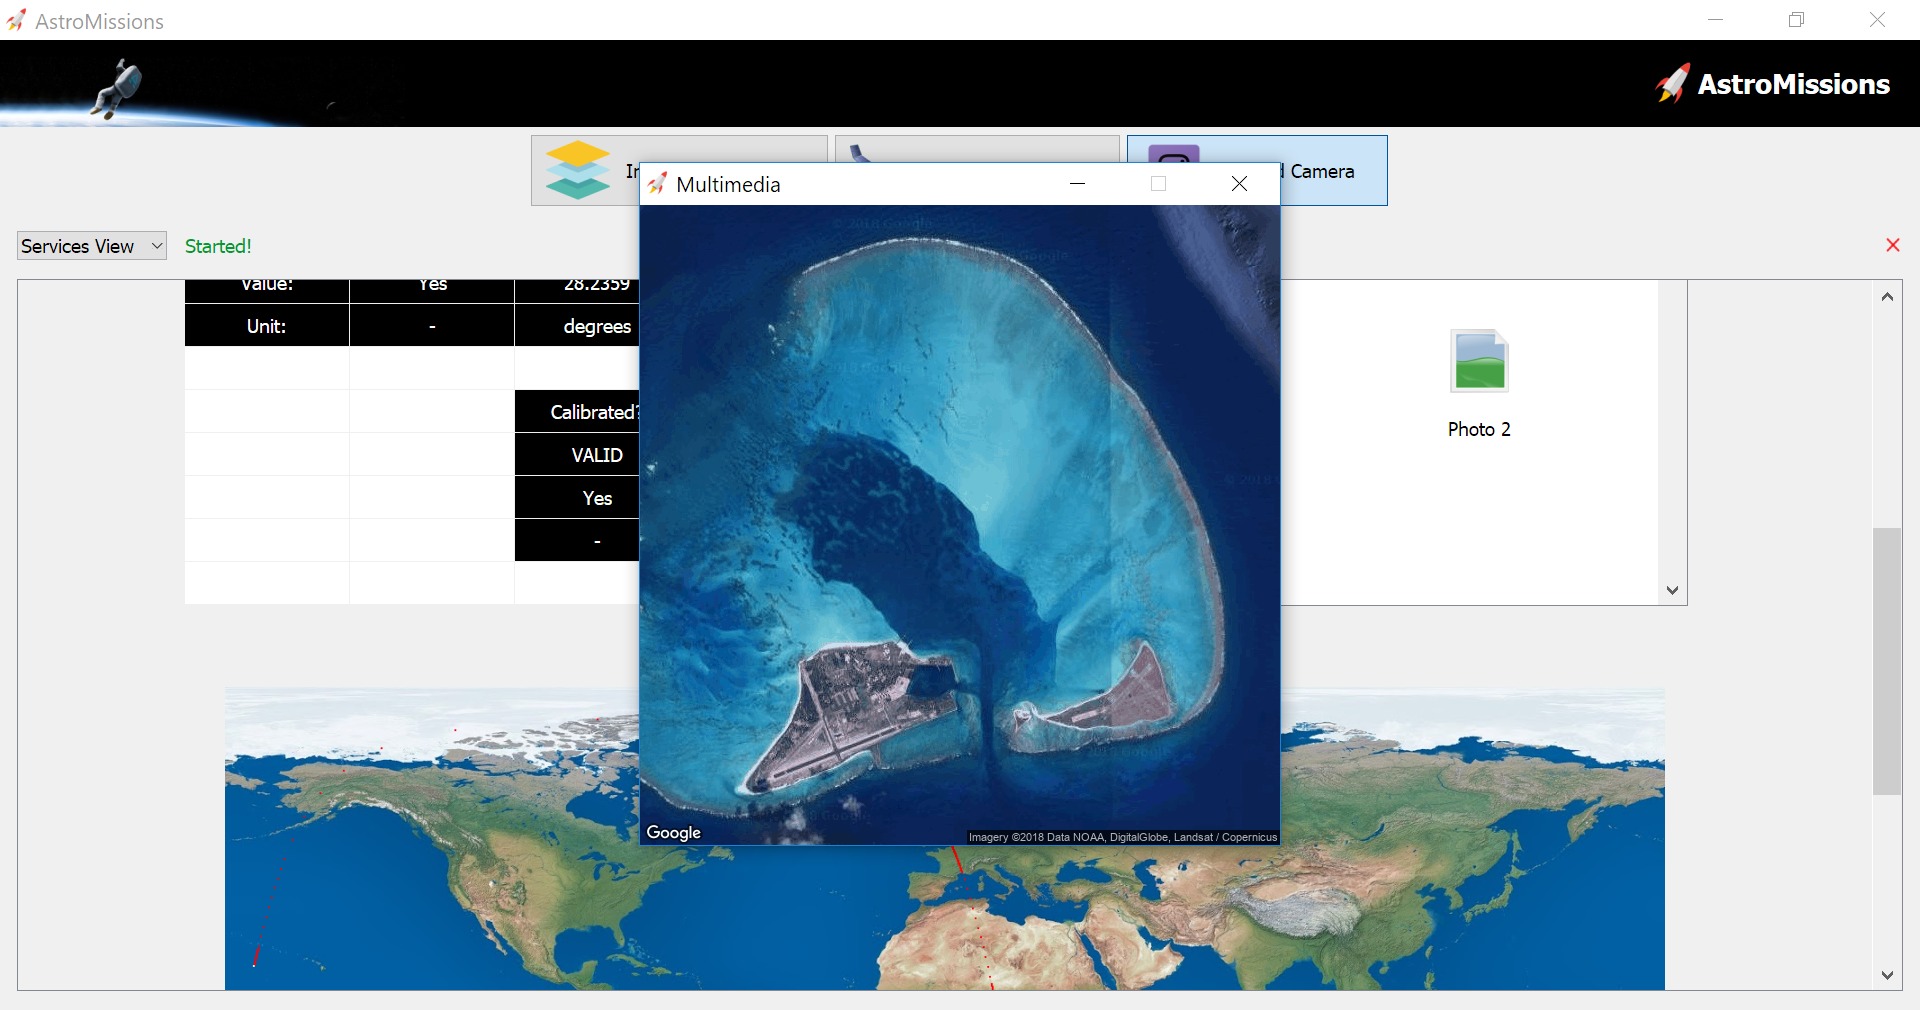
To take the photograph, you will have to execute sequentially the actions “Calibrate Camera”, “Set Zoom: 13” and “Take Photograph”. If you have done everything correctly, you should see the image of the second target, the Midway island.
Learn more about the Midway island, a National Wildlife Refuge paradise that hides a very dirty secret: